|
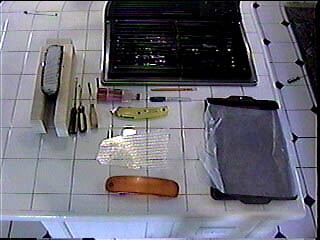
Materials: |
|
|
Materials: |
|
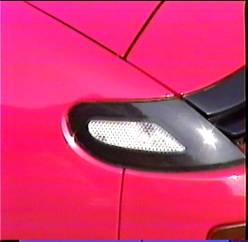
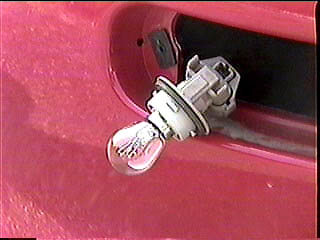
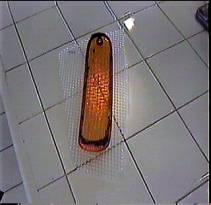
Go over to your car and, with a phillips screw driver, remove your turn signals
from your car. There are little gray pieces that lock in the turn signals that
holds the light bulb in place. Turn the gray piece counter clock wise and it
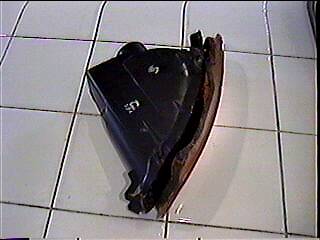
will pop right out. Ok, now that you have the signals in you hands, (the black
box and the orange lens ), take them inside.
Take your baking pan and place 1 of the light on it. Pre-heat your oven to 375
degrees. Once heated, place you light in the oven for 50 SECONDS. When it comes
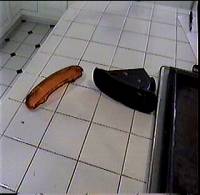
out, the light will be very warm but still touchable. Pry the orange piece off
the black using a flat blade screw driver. Take your time, if you force the
light out, you are liable to bend or break the black box. There are four(4)
little prongs on the orange piece that snaps into the black piece. Look at the
light you will see them. Do the best you can to remove the orange from the
black. It is not real hard. You will have to bake them for about two times to
get the orange lens off the black piece. Take a utility knife and cut the glue
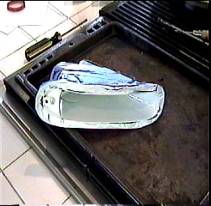
as you pull the pieces apart. After you get the 2 pieces apart, you need to go
ahead and paint the inside of the black box. The paint will reflect light
better than the black plastic.
Mask off the areas for the black parts that you don’t want painted. Shake the
spray paint well and then proceed to spray the inside of the black box.
There is a little reflective mirror piece inside too. You can either take it
out or paint over it. I couldn’t get mine out so I just painted over it. While
your letting that dry, move on to making the clear lens-step 4.
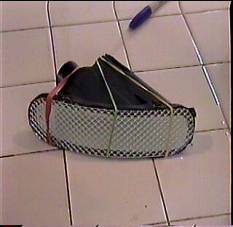
Take the plastic office lighting and make a square foot of it. Now take your
sharpie and your original orange piece. Place the orange piece on the office
plastic stuff and trace around it with your sharpie. You will have to bend the
plastic so it looks and bends the same way as the orange covering does. It
won't break. After you have a copy made just like the orange piece, take your
dremmel tool or grinder and just start sanding away at the plastic until it
looks like and is the same size as the original piece. Measure it up to the
black box. The plastic will be to big to fit in the box so try it out and then
cut it to fit right in there. The clear plastic should fit right on top of the
box-not overlapping. Once you have the plastic cut right, take out your 3
rubber bands. Place them evenly around the two pieces(new clear and the black
box.)
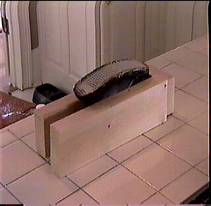
The next step is gluing the clear piece onto the black piece. It is hard to
hold and do this so I made a stand that hold the box. I mad mine out of 2X4s
and nails. Look at the picture. It was easy to make or you can use a vise or bench press to hold the turn signal. Or, just come up with
something even better. Ok, on to the gluing.
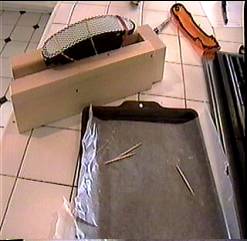
Take the baking pan and place the sheet of wax paper on it. Cut the wax paper
to the size of a sheet of notebook paper. That is where you are going to mix
the epoxy. Epoxy is a real strong glue and can be found in any hardware store.
Read the directions on the back of the glue box. There are some special
instructions to follow if it is a new bottle of glue. Take the glue and pour a
small amount onto the paper. With your toothpick, mix the glue for 30-45
seconds. Don’t pour too much glue because it hardens in 5-10 minutes. So just
work small. Dip the toothpick in the glue and apply the glue to small portions
of the piece making sure that there are no holes that comes between the black
box and the clear plastic. Try to not get too much glue on the clear plastic
either. Remove the rubber bands when you are certain the plastic will not come
loose of the black box. Then cover the areas that the rubber bands left. The
less glue you get on the plastic, the better it looks. Just make a mental note
that you can get glue about 1/8th of an inch onto the side of the plastic. This
way your glue will look somewhat straight and not real messy. After you have
covered the edges in glue, you will have to cover the little holes where the
prongs of the orange piece snapped into the black box. The glue should cover up
the holes fine.
Let the whole assembly dry for 1-2 hours. The glue dries in 10 minutes but just
to be safe.
Take your dremmel tool or grinder and remove all the excess glue i.e. big
lumps, drops and points. make a nice clean line of glue like this but don’t
take too much off. Just what is real noticeable. Then it is time to make the
holes that the screw goes into to hold the light onto the car. Take a drill or
dremmel tool and drill a whole that the screw will go into. Do not press down
to hard on the clear plastic because the added pressure might break it. Once
your glue is shaped, you can either take vinyl and cover the outside of the
lights to cover the glue. If your lights look good with the glue, then you
might not want to put the vinyl on.
Take your lights and put them back on your car. Remember to not tighten the
screws too much. Just to make the light snug. You will see the plastic flex and
that is when you know to stop tightening.
Take a minute to look how much better your car looks and then drive around town
and look all the people watching your car as you drive by.